Table of Contents
Installing PHP 8.1.12 for Windows IIS 10
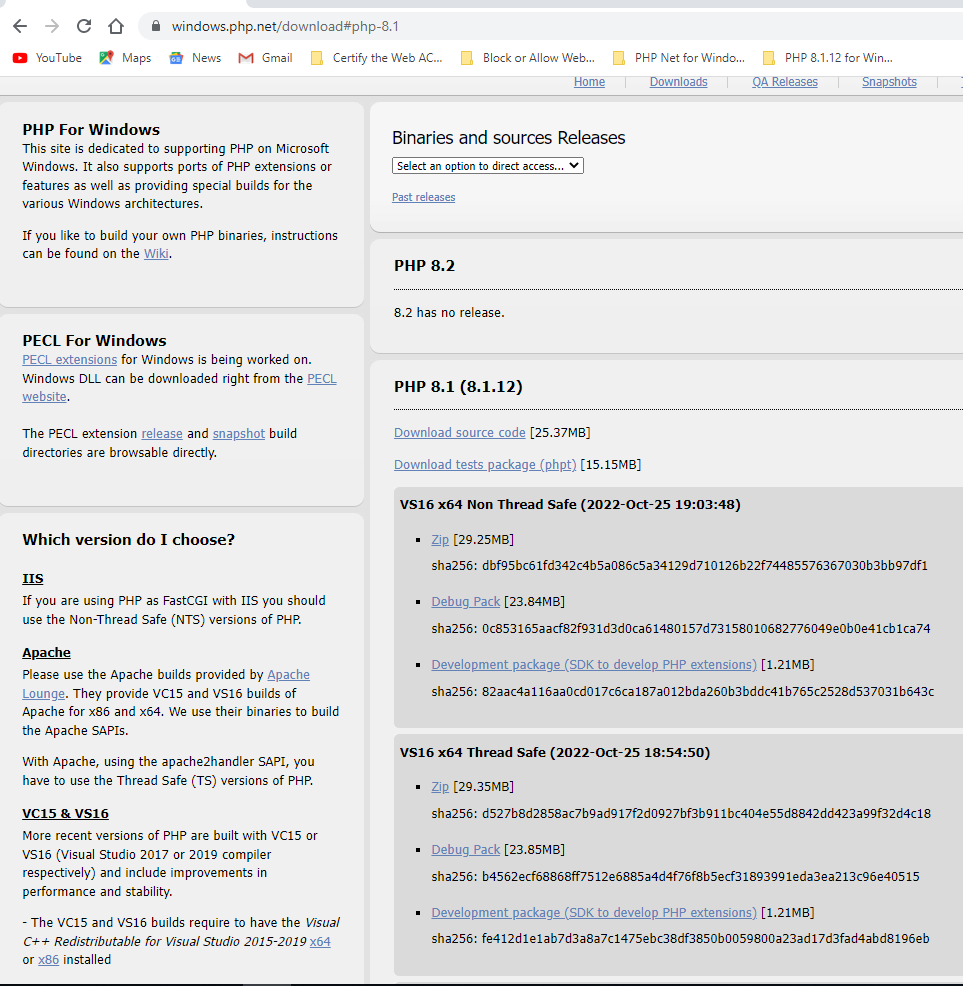
Download the Non-Threadsafe x64 (64-bit) version of PHP 8.1.12 (or latest version) from here https://windows.php.net/download#php-8.1
Unblock the Zip File (Properties - Clear Check Box - “This file came from another computer and is blocked . . . etc” Click OK.
Unzip the Zip File to php_8_1
Using Windows file explorer, copy and paste the contents of the “php_8_1” directory (that is, all files and subdirectories) to your new and separate PHP path, such as c:\php_8_1
Using Notepad++ or similar advanced text editor, in the root of the php_8_1 directory, find and open the file “php.ini-production” and save as a new file named “php.ini” without the quotes.
Here is a snapshot of the Windows PHP8 download page which also lists the other requirements such as the Visual C++ Redistributable that must be installed on the Windows server system.
Make Sure that you have installed on your Windows Server system the Visual Studio C++ Redistributable 2015-2019 X64 (or x86 32-bit as applicable). To Check, in the Windows search (bottom left of screen next to START), type “Control Panel” and Click the hit to open it, and then open “Programs and Features” and then on the left click the link for “Turn Windows Features on or off. Check from the resulting list whether VS C++ 2015-2019 x64 is installed.
Configure Handler Mappings for FastCGI Module in IIS Manager
- Start IIS Manager by clicking on Start, Programs, Administrative Tools, and then Internet Information Services (IIS) Manager.
- From the IIS Manager, click on the hostname of your server in the Connections panel on the left to add php mapper handling on a global basis (or instead select the hostname of the particular website if you are adding php mapper handling at the Website Level)
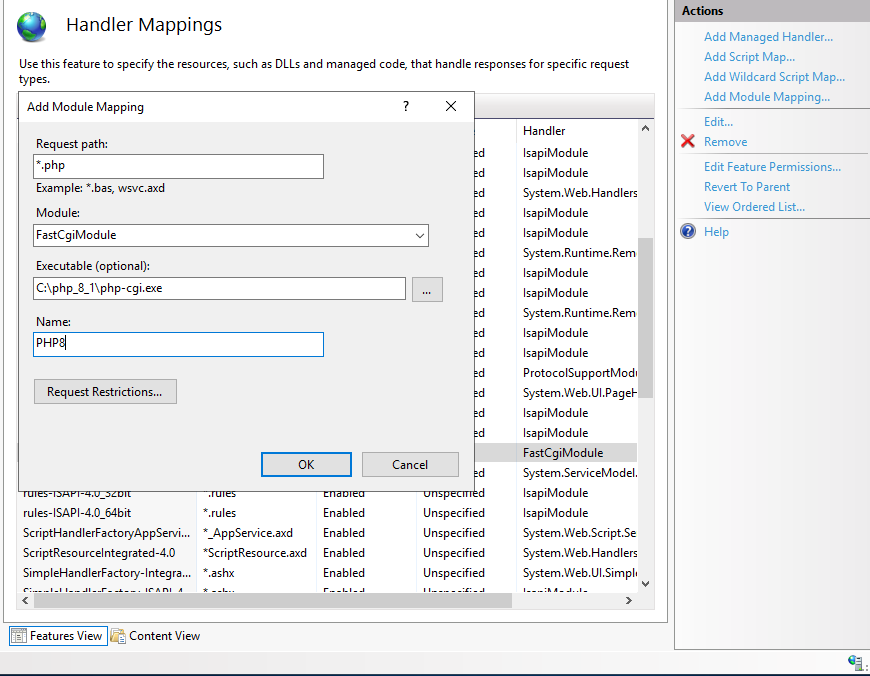
- Double-click on the Handler Mappings icon. Insert a screen capture here depicting IIS and handler mappings
- From the Handler Mappings Actions panel, click on Add Module Mapping.
- Type the following information into the appropriate text boxes, and then click OK. Request path: *.php then Module : FastCGImodule then Executable: C:\php_8\php-cgi.exe then Name: PHP8
- Click OK, and then click Yes.
- NOTE: If you are trying to add a new or additional *.php mapping (or remove script access from an existing php version) AT THE WEBSITE LEVEL IN IIS Server and you receive an error message that you don't have the necessary permissions to do so, then try clearing the checkmark next to “read-only” on the first tab of property pages for the file “web.config” in the root of the particular website.
At the Website level, in order to disable the particular version of PHP that you will not be using, you may be able to select the unwanted mapping and click remove at the right, or select the unwanted php version and select edit permissions and disable “script” access for the unwanted mapping.
Configure the php.ini File
- In the c:\php_8_1 folder, open the php.ini-production file using a good text editor like Notepad++ and then “save as” the contents of this file using the new file name “php.ini” and then close (x) both the php.ini-production file (tab) and the new php.ini file (tab) from within Notepad++.
- Re-open the php.ini file using Notepad++ text editor and then un-comment and modify certain settings within php.ini as follows:
- Set fastcgi.impersonate = 1 ;REMARK FastCGI under IIS supports the ability to impersonate security tokens of the calling client. This allows IIS to define the security context that the request runs under.
- Set cgi.fix_pathinfo = 0 ;REMARK The cgi.fix_pathinfo provides PATH_INFO/PATH_TRANSLATED support for Common Gateway Interface (CGI). Setting this to 1 will cause PHP CGI to fix its paths to conform to the specification.
- Set cgi.force_redirect = 0
- Set open_basedir = a path pointing to a folder or network path where the content of the Web site(s) is located. (Such as c:\hostdata), or just leave it commented like this ”;open_basedir =“ without the quotes
- Set extension_dir to point to a location where PHP extensions reside. This is typically extension_dir = ”./ext“ However, per remarks in the “php.ini-production” file in both PHP7 and PHP8 it says for “Windows” set it instead as follows: extension_dir = “ext”
- Set error_log=“C:php_errors.log” ;REMARK This can help with troubleshooting. Alternatively, set error_log = “c:\php\logs\errors_log” and make a new sub-folder in c:php named “logs” and grant the sub-folder “logs” full control write access for both IUSR and IIS_USERS.
- Enable the required PHP extension by un-commenting the appropriate lines within the extensions section of the php.ini file. See a further discussion of which extensions to enable.
Enable Extensions in the php.ini file for PHP 8
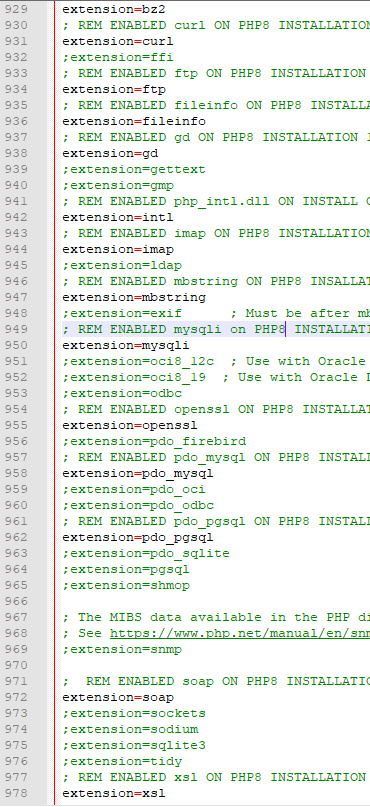
Using Notepad++ or similar text editor, find and edit the php.ini file to enable extensions. Make sure that the applicable/corresponding php_*.dll file for the extension that you wish to activate is still available within the latest php8/ext/ directory
See the following screen snippet for examples of extensions to enable:
Enable File Uploads in php.ini file for PHP 8
Use a file editor like Notepad++ to edit the php.ini file.
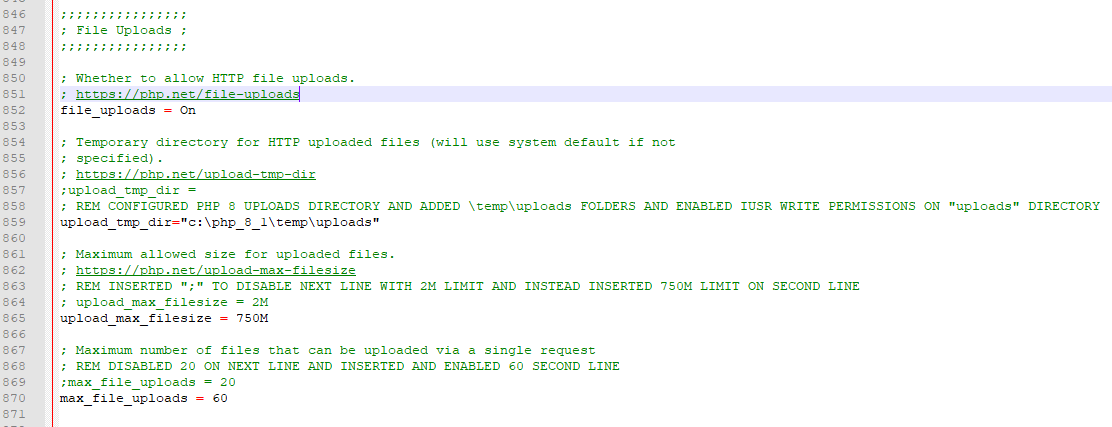
By default file uploads are enabled.
file_uploads = On
See the following screen snippet for examples of configuring php.ini for file uploads:
Enable Sessions Save Path to New TMP Directory
See the following screen snippet.

Matters to Consider with PHP 8
- Do we need to install PEAR any longer? https://pear.php.net/package/PEAR/ https://pear.php.net/package/PEAR/download
- Do we need to install and enable an extension for XMLRPC any longer? Is it deprecated or just no longer located in directory /ext/ as a dll extension, and no longer listed in the extensions section of php.ini?